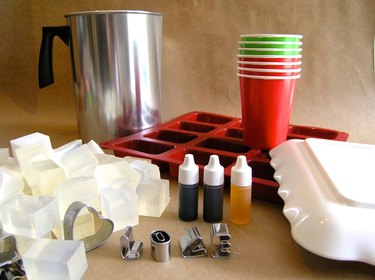
Things You’ll Need
-
Clear and/or opaque melt-and-pour glycerin soap base
-
Melting pot with pour spout
-
Heat-safe, non-stick, silicon molds such as small loaf pans
-
Soap coloring
-
Fragrant oils such as lavender or rose (optional)
-
Shallow plastic box such as a Tupperware lid or tray
-
Small cookie cutters
-
Letter cookie cutters
-
Heat-safe mixing containers such as coffee cups
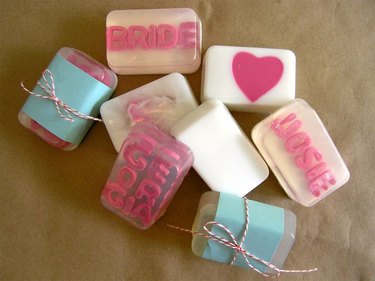 Homemade soaps are great gifts! Image Credit: Jessica Begum
Homemade soap is an ideal birthday present, teacher or hostess gift or wedding shower favor. Glycerine soap base comes in a few different varieties, such as honey, aloe and shea butter; most soap bases come without added colors or fragrance. You can easily personalize soap with fragrance, colors, and even names and short phrases as shown here.
How to Make Colored, Scented Soap
Step 1
 Supplies for making homemade soap Image Credit: Jessica Begum
You can make colored, scented soaps with melt-and-pour glycerin soap base, soap coloring, essential oil and soap molds. Any heat-resistant, nonstick silicon mold will work. Please see the last slide for an itemized list of tools and materials.
Step 2
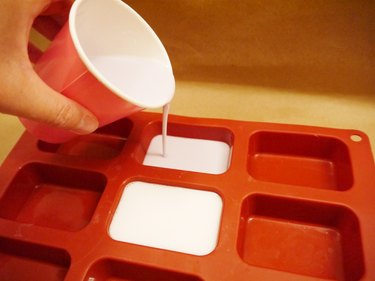
 Melt and pour your soap base into the molds. Image Credit: Jessica Begum
Melt the base over low heat. Glycerine soap base comes in a few different varieties, such as honey, aloe and shea butter; most soap bases come without added colors or fragrance.
To determine the amount of soap to melt, consider the size of your soap mold. The mold used here yielded 12 soaps, each 2 inches by 3 inches by 1 inch. One-fourth of a pound of soap base will make three soaps of this size; one pound of soap base is enough to make all 12 soaps of this size.
Step 3
 Add color and fragrance. Image Credit: Jessica Begum
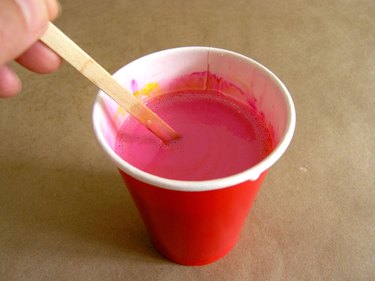
Transfer the melted soap to heat resistant container, such as a paper coffee cup, to add coloring or fragrance.
To add a scent to the soap, place 3 to 5 drops of essential oil per 1/4 pound of melted soap for a lightly fragrant soap. For a more fragrant soap, add more essential oil, little by little, until the desired fragrance is achieved.
To color the soap, add a few drops of soap dye to lightly color 1/4 pound of melted soap. The more dye you add, the darker the soap will become. Lavender (shown here) is made with 2 drops of red dye and 1 drop of blue.
Step 4
 Pour into molds. Image Credit: Jessica Begum
Mix thoroughly and pour into molds. Allow soap to set for several hours on a flat surface or place mold in the refrigerator if you'd like to harden the soap faster.
Spell Out Words or Make Shapes in Your Soap
Step 1
 Melt white soap base. Image Credit: Jessica Begum
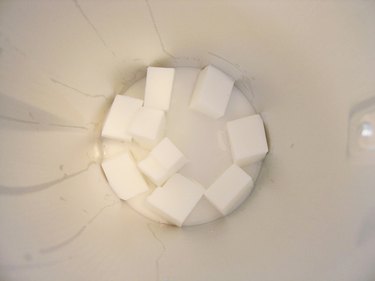
Melt about 1/4 of a pound of opaque white soap base in a melting pot on low heat.
Step 2
 Add color. Image Credit: Jessica Begum
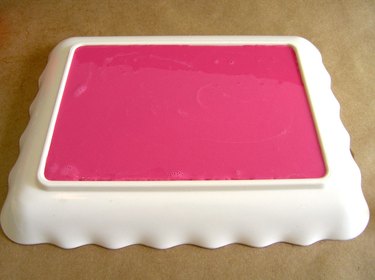
Add a little color, if desired; just be sure it's not so dark that your shapes and colors aren't visible. To add color, transfer the melted soap to a mixing container, add a few drops of color and stir. This color was made with 20 drops of red and 5 drops of yellow.
Step 3
 Pour into shallow tray. Image Credit: Jessica Begum
Pour the soap into a shallow tray, plastic box top or Tupperware lid. The tray shown here is a turned-over serving tray with a lip. A thin layer of soap no more than 1/4 inch high is best. Allow the soap to harden for about 20 minutes. Place the tray in the refrigerator if you want the soap to set faster.
Step 4
 Cut out words and shapes from the soap. Image Credit: Jessica Begum
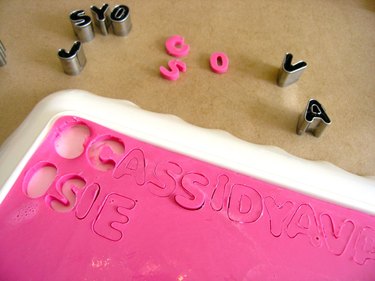
Cut out names, words or shapes with small letter cookie cutters. Set the shapes aside.
Step 5
 Pour clear soap base 1/4 inch in mold. Image Credit: Jessica Begum
Melt clear soap base over low heat. Pour this clear soap 1/4 inch into the molds and allow to set for about 15 minutes. You don't want the soap to completely harden, so do not place it in the refrigerator. You want the soap firm enough to hold the letters, but not completely solid. This step can take some practice.
Step 6
 Arrange words/shapes backward. Image Credit: Jessica Begum
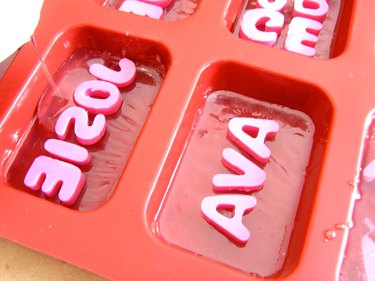
Arrange the letters and/shapes in the molds — positioned as a mirror image — on top of the pre-poured clear soap. When finished, the bottom of the molds will be the top of the soap.
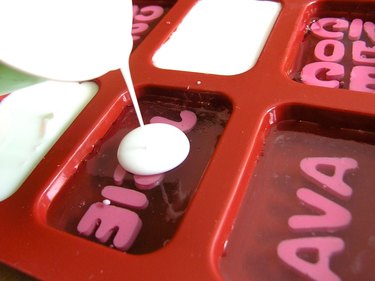
Step 7
 Pour more clear soap over the letters. Image Credit: Jessica Begum
Pour more clear soap over letters. The soap must be warm enough to pour, but not hot enough to melt letters. This step is a bit tricky and requires a little bit of patience and practice. Reserve a few molds to practice until you get the hang of it.
Step 8
 Back with an opaque layer. Image Credit: Jessica Begum
Fill the soap molds completely with clear soap base. Or, stop 1/4 inch from the top, allowing the clear soap base to set and then pouring a layer of opaque soap over the clear layer. Allow the soap molds to harden for two hours.


