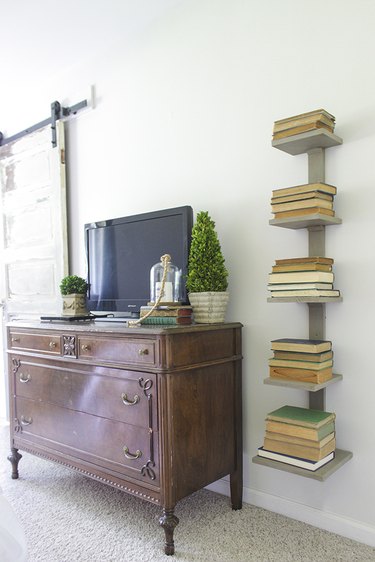
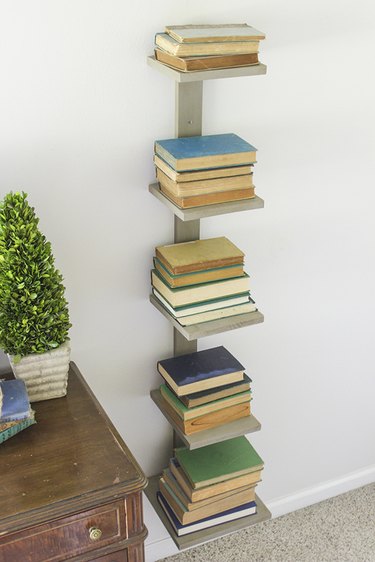
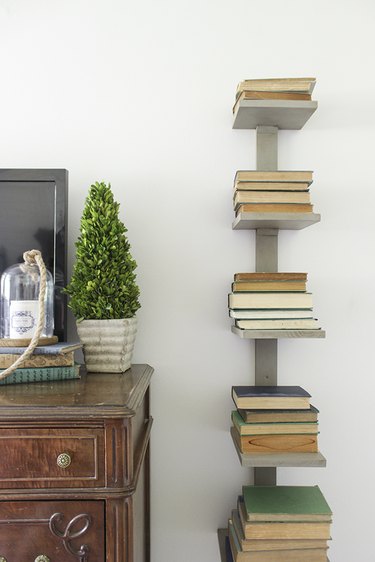
One of the challenges of living in a small space is creating functional and stylish storage. College students especially can find it difficult to organize books when space is too limited to have a bookcase. This five-shelf unit vertically organizes an abundance of literature while giving stacked books an artistic, sculpture-like appearance.
Things You’ll Need
-
One-by-three pine board, 60 inches long
-
One-by-nine pine board, 35 inches long
-
One-by-twelve pine board, 11 inches long
-
Measuring tape
-
Speed square
-
Circular saw
-
Wood clamps, 2
-
1/2-inch wide chisel
-
Wood glue
-
Cordless drill/driver
-
2-inch long self-tapping wood screws, 10
-
Miter saw
-
1/2-inch nails (18-gauge if using pneumatic/electric nail gun)
-
Hammer or pneumatic/electric nail gun
-
Wood filler (optional)
-
Sand paper, 220-grit
-
Paint or stain of choice
-
Stud-finder
-
Drill bit, 7/64
-
10# 3-inch long wood screws, 3
Step 1: Cut the Wood
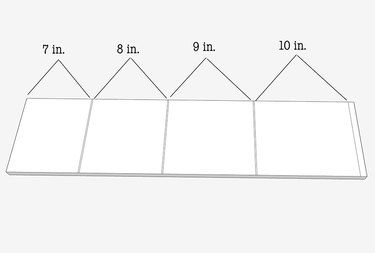
Measure, mark and cut the one-by-nine pine board to the following lengths: 7 inches, 8 inches, 9 inches, and 10 inches. Note that the total combined length is 34 inches, but an extra inch is needed to allow for the saw blade width.
Measure, mark and cut the one-by-three pine board to 52 inches. Set aside the extra.
Tip
To ensure accuracy when cutting multiple lengths from the same board, measure one length, cut, then measure the next length, cut, and so forth, until all the lengths are cut. Measuring all the lengths first without allowing for the saw blade width (even when you know the approximate width of the saw blade) will likely result in incorrect cut-lengths.
Step 2: Mark the Shelf Spacing
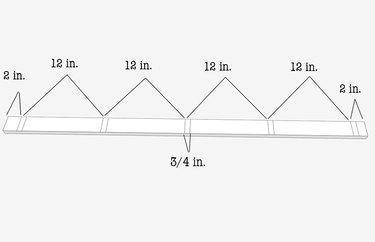
Starting from one end of the one-by-three pine board that you just cut, measure and mark 2 inches from one side, then 4 more marks spaced 12 inches apart. This will be the "spine" of the bookshelf.
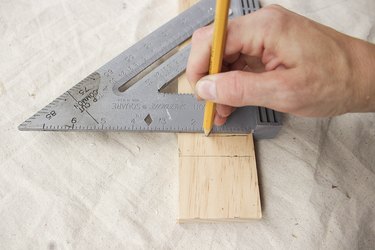
From each of the five marks, measure 3/4 inch (the thickness of the wood shelves) down so there is exactly 11 1/4 inches between each shelf. The top shelf will be 2 inches from the top, and the bottom of the bottom shelf will be 1 1/4 inches from the end. Draw the lines using a speed square to ensure the lines are exactly straight. These shelf marks will be your guide for when you notch out the wood with the circular saw.
Step 3: Adjust the Circular Saw Depth
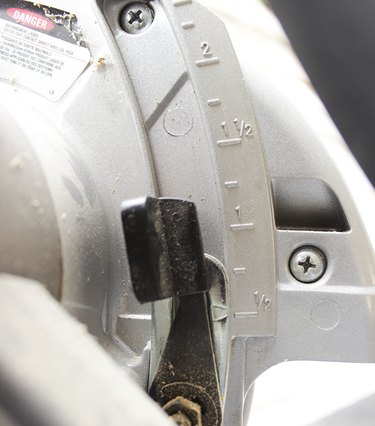
Each circular saw has a blade depth adjustment, which will need to be adjusted to 1/2 inch. This is so you won't cut through the "spine" when you make the notches.
Step 4: Secure the "Spine" to a Board
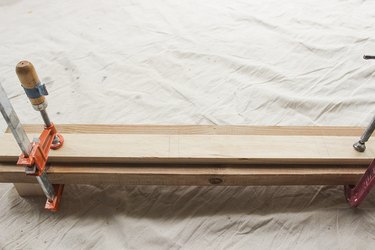
Secure the one-by-three "spine" board to another board (it can be any size) that is elevated such that clamps can keep the "spine" from moving while cutting it. Clamp on either end of the marking that will be cut.
Step 5: Cut Notches on the "Spine"
Starting with one of the 3/4-inch shelf marks, follow the bottom line carefully with the circular saw blade, making sure to go all the way across the board. Do the same thing along the top line. Make several cuts all the way across between the initial cuts, as close together as possible, but not spending too much time to get it perfect. Then, using a 1/2-inch wood chisel, remove any extra bits of wood between the top and bottom cuts so that the notch is flat and smooth.
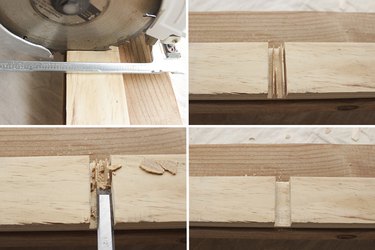
Tip
To ensure the shelf board inserts easily into the notch, you may have to cut slightly outside one of the shelf marks, making sure to cut no more than 1/16 inch outside of the line. If the notch is too wide, the shelf will lag.
Repeat the process for all five notches on the "spine. "
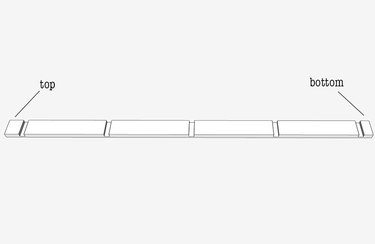
Step 6: Attach the Shelves
Measure and mark the center of the top four shelves (one-by-nine boards) to allow it to slide into the "spine,"centered. If your one-by-nine board is 8 1/2 inches wide (standard), then you will subtract 2 1/2 inches (width of "spine") and divide by 2. So marking 3 inches from either side will show the exact location that the board will slide into the notch on the "spine."
The bottom shelf is 11 1/2 inches wide, so the center mark will be 4 1/2 inches from either side.
Place a small amount of wood glue in the notch, slide in the shelf, lining up with the center marks that were made, and attach two 2-inch drywall screws from the back, making sure to screw them into the center of the shelf-thickness.
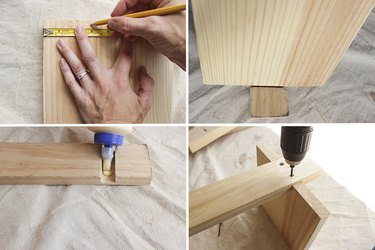
Repeat this process for all five shelves.
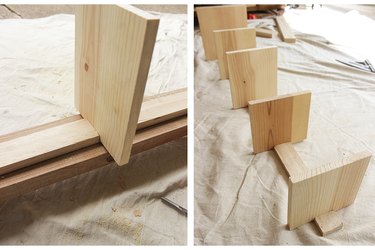
Step 7: Make Shelf Supports
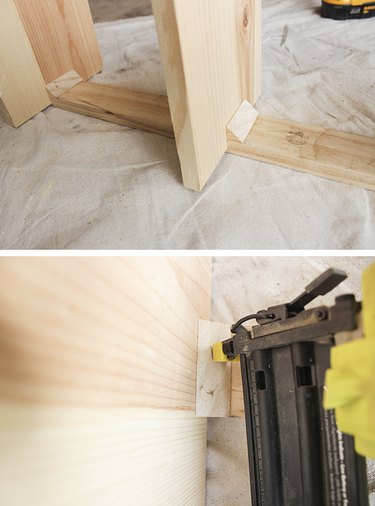
To make shelf supports from the extra one-by-three pine board, adjust the miter saw to 45 degrees and line up the board so the saw blade cuts a triangular prism. This is the first shelf support. Readjust the saw blade to 0 degrees and make another cut from the extra board, straight down to make another triangular prism. Repeat until five shelf supports are cut.

Step 8: Attach the Shelf Supports
Attach the shelf supports on the underside of each shelf, where the shelf meets the "spine," using wood glue and 1/2-inch nails. Nails can be driven in with a hammer, or if an electric nail gun is available, use 18-gauge nails of the same size.
Step 9: Sand & Paint or Stain
Fill any gaps or holes as needed with wood filler, and then use 220-grit sandpaper to sand any splinters, rough or sharp corners until the edges are smooth. Finish with any paint or stain of your choice.
Step 10: Mount Shelf on the Wall
Using a stud finder, mark the stud location on the wall where the bookshelf will be attached. Pre-drill holes using a 7/64 size drill bit, and then attach the "spine" of the bookshelf into wall at the top, middle and bottom, using 10# 3-inch wood screws.

This spine bookshelf was created with varying size bookshelves, but can be made with uniform size shelves. Fill it with stacked books as pictures, or with upright books, small decorative items, DVDs, or other collections.
