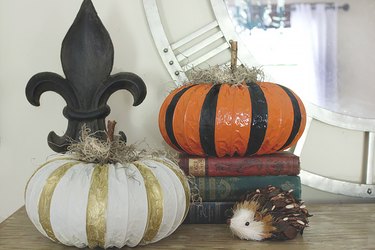
A traditional and historic symbol of fall, pumpkins are the quintessential autumn decor element. If you're looking for a clever way to display pumpkins without the mess or hassle of carving them, gather up some leftover dryer vent hose and make these easy and elegant ones.
Things You’ll Need
-
Flexible dryer vent hose, 5 feet
-
Sharp knife
-
Wire cutters
-
Hot glue gun
-
Spray paint (multiple colors if desired)
-
Acrylic paint (multiple colors if desired)
-
1/4-inch paintbrush
-
Small sticks, one for each pumpkin
-
Spanish moss

Step 1
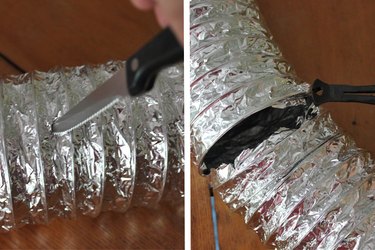
The dryer vent hose has circular wire rings running throughout the interior of the hose. Each pumpkin will need a length of at least 30 wire rings. Count 30 rings on the hose and use the tip of a sharp knife to puncture the dryer vent hose in-between the wire rings to start cutting off the portion of 30 rings. Continue cutting through the hose and use wire cutters to separate this section from the rest of the hose.
Step 2
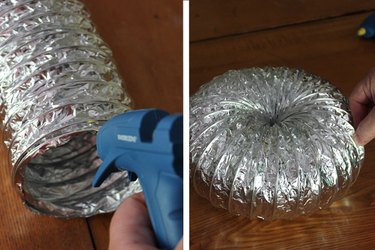
Apply a thick line of hot glue to one end of the 30-ring hose. Working quickly before the glue dries, twist the hose into a circle and press the two ends together. Hold the ends together for approximately 45 seconds while the glue dries.
Warning
Use caution while using the hot glue gun. Make sure the glue does not come into contact with your skin.
Step 3
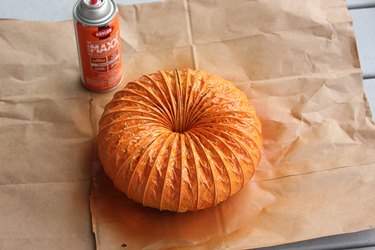
In a well-ventilated room or outside, apply a thin coat of paint to the pumpkin. Allow the paint to dry completely, and add another thin layer of paint. Painting in thin, light coats prevents paint drips.
Tip
Protect your work area by covering it in cardboard or newspapers.
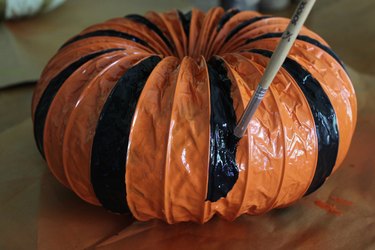
Step 4
Use acrylic paint and a 1/4-inch paintbrush to add decorative stripes between the wire rings. Allow the paint to dry completely. In this project, every third ring was painted with a stripe.
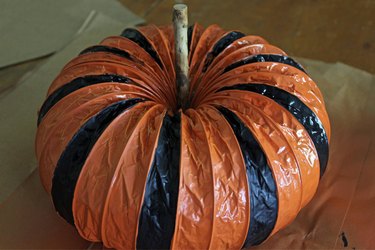
Step 5
Place a 6-inch stick in the center of the pumpkin. The stick should fit snugly in the center, but if it feels loose, place a dab of hot glue in the center of the pumpkin before adding the stick.
Tip
If you do not have access to a stick, a cinnamon stick will also work in the center of the pumpkin.
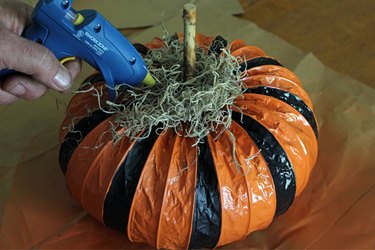
Step 6
Use the hot glue gun to attach Spanish moss to the center of the pumpkin around the stick.
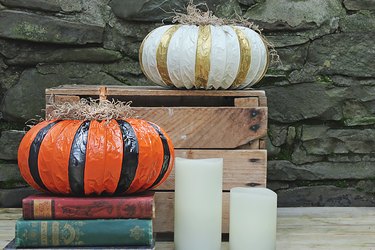
Choose an area to display your new dryer vent pumpkins. Placing them on a stack of books or a wooden crate gives them height.
Tip
If you choose to display the pumpkins outdoors, bring them in during bad weather or windy conditions.


