Things You’ll Need
-
40 ft. of 1 inch schedule 40 PVC
-
9 90 degree elbows
-
26 T connectors
-
PVC cement
-
Plastic spray paint
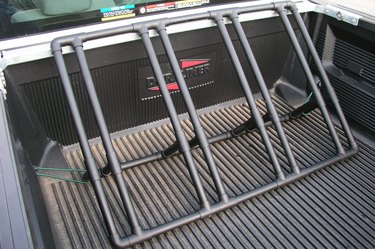 Installed pickup truck bike rack. Image Credit: Debbie Williams
Buying a bike rack for a truck can be expensive, and the majority of them are heavy to move and only work in the truck bed. You can easily build a bike rack yourself to safely transport up to 4 bikes in the back of a pickup truck with PVC pipe and a little time, saving you a lot of money. The rack also stands on its own so that it can be used in the garage to corral the bikes between trips.
Step 1
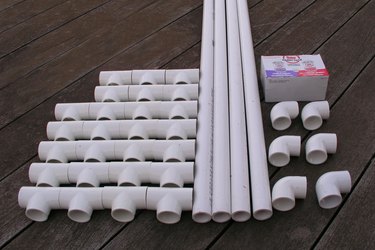 Materials for the bike rack. Image Credit: Debbie Williams
Collect the supplies needed, which can be found at any home improvement or hardware store. A power miter saw is a nice timesaver, but a hacksaw and a little elbow grease will work as well. It's also a good idea to have some sandpaper on hand.
Step 2
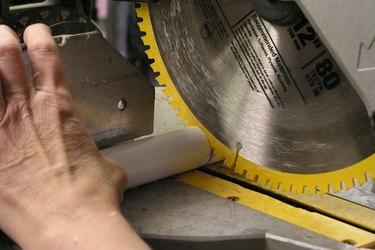 Cut the PVC pieces. Image Credit: Debbie Williams
Cut the PVC pipe to the following lengths: 8 – 18 1/2 inch 9 – 9 3/8 inch 8 – 8 1/2 inch 9 – 9 1/5 inch 12 – 1 3/4 inch
(It makes things easier if you set a stop block at the cutting measurement so that all the pieces are identical.) Wipe each end with a piece of sandpaper to remove any cutting burrs.
Step 3
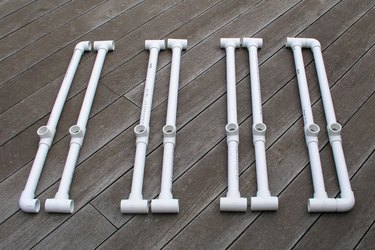 Parts laid in place. Image Credit: Debbie Williams
Assemble six pipe sections with one T connector, one 18 1/2-inch section, followed by a T connector, the 9 1/2-inch section and one more T connector. Assemble two end sections with the same pattern except use 90 degree elbows at each end. Lay out the sections in pairs as in the photo.
Step 4
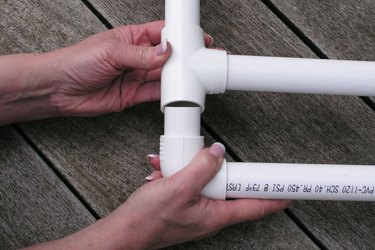 Make the connections. Image Credit: Debbie Williams
Use the 1 3/4-inch pieces to join the paired sections and the 9 3/8-inch pieces between each pair.
Step 5
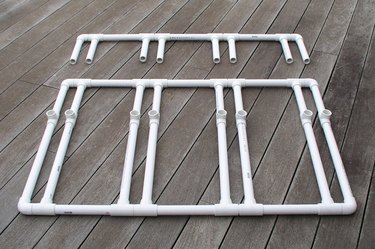 Support stand laid out. Image Credit: Debbie Williams
Layout the support section pairs using the 8 1/2-inch pieces as the verticals topped with a T connector and the remaining 9 3/8-inch pieces as the horizontals, again placing 90 degree elbows on the corners.
Step 6
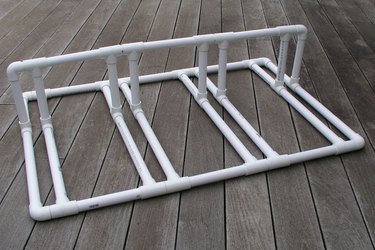 Attach the support stand. Image Credit: Debbie Williams
Connect the support structure to the main section. Working against a flat surface, adjust the fit and set the correct angles for all the elbows and T connectors.
Step 7
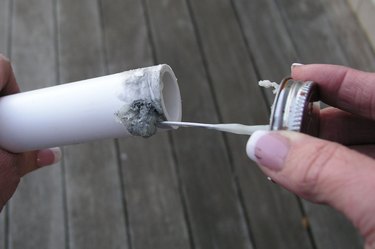 Apply the glue around the tube. Image Credit: Debbie Williams
Try the bike rack in the pickup truck to be sure it fits before gluing. Remove each piece one at a time and apply PVC cement around the tube before replacing it into position. This glue sets very quickly, so be sure to have the pieces at the appropriate angle before pushing them together.
Step 8
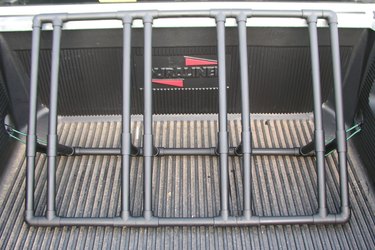 Bike rack in the truck. Image Credit: Debbie Williams
Although it is not absolutely necessary, it is a good idea to spray paint the PVC to protect it from sun damage which causes it to become brittle. When completely dry, set the bike rack in the back of the truck and secure it to the bed hooks with bungee cords.
Step 9
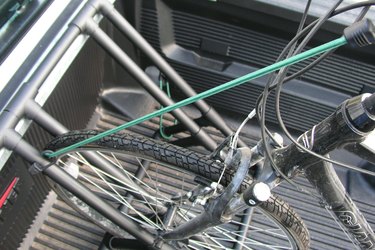 Bike secured in the rack with bungee cord. Image Credit: Debbie Williams
To set a bike in place, push the tire forward between the narrowly spaced PVC. Secure the bike to the bike rack by running a bungee cord from the handle bar to the rack. You can drill holes in the pipe to attach the hook, or just wrap the cord around the pipe.


