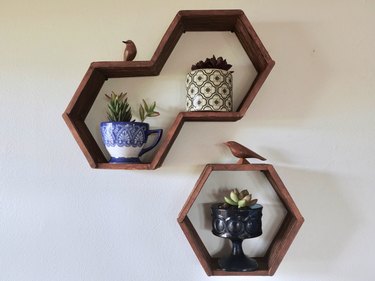
Think popsicle stick crafts are strictly for the grade school set? If so, this project will have you looking at these humble wooden sticks in a completely different way. In recent years, geometric shapes have been hot in fashion accessories, art, and home decor. Mid-century inspired hexagon shelves, in particular, have been popping up at loads of trendy retailers including West Elm, Urban Outfitters, and World Market. We'll show you how to make your own honeycomb shelves for a fraction of the cost you'd pay at the store using our printable template and some easy-to-find materials. You can even use the template to come up with your own geometric configurations, so get creative!
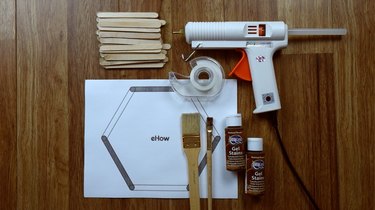
Things You’ll Need
-
4.5 inch x 1 inch popsicle sticks (See tip below)
-
Hexagon shelf template, downloaded and printed
-
Hot glue gun
-
Wood stain of your choice
-
Craft brushes (if using gel or liquid wood stain)
Tip
The quantity depends on the number, shape, and depth of the shelves you’d like to make. A single hexagon shelf about three inches in depth requires 102 popsicle sticks (17 sticks per side).
How to Make a Basic Hexagon Shelf
Step 1
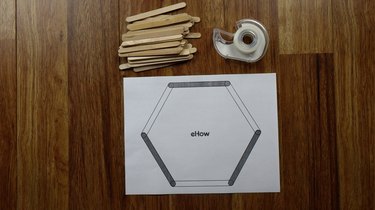
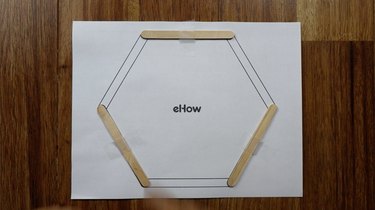
Download and print the hexagon shelf template. Notice that, on the template, every other side of the hexagon is colored gray while the others are white.
Step 2
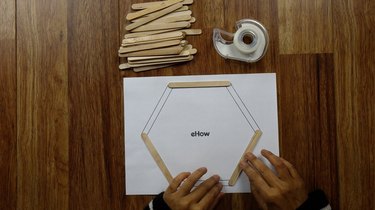
Lay three popsicle sticks down on the gray colored sides, as shown below. You've now laid down half (or, three sides) of your foundation hexagon for your shelf.
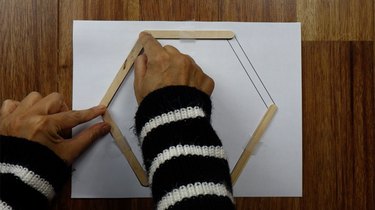
Step 3
To make sure that your foundation hexagon is perfectly shaped, tape your first three sticks to the template so they don't move around. You're going to layer all subsequent sticks on top, using the foundation layer as your guide — so you want this to be as symmetrical as possible.
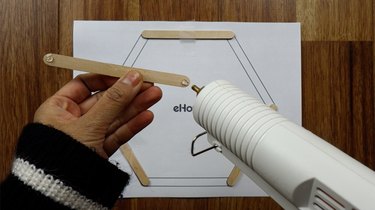
Step 4
Now you're going to glue down the remaining three sticks of your first hexagon to the sticks you've taped to the template. Dab a bit of glue near the edge of each end of a popsicle stick (as shown below) so you can join the sticks where the ends overlap at each corner.
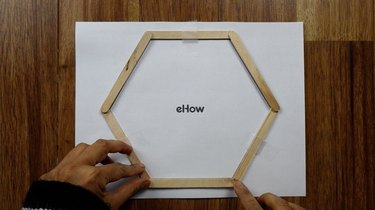
Glue the stick down using the lines on your template as guides (see below). You've now connected three sides of your hexagon.
Glue down the other two sticks until you've completed your foundation hexagon.
Step 5
Remove the tape and template from your work, then lay down your second hexagon in the same pattern as you did the first, making sure that each stick you glue down is aligned to the one below. You can refer back to the gray and white colored areas on the template to guide you as to stick placement pattern. When you're done with the second hexagon, here's what your project should look like from the side.
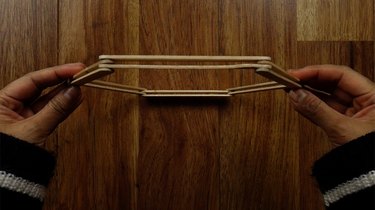
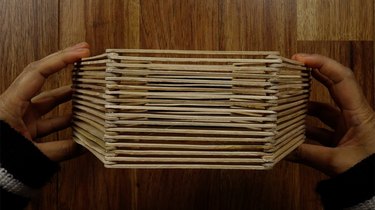
Continue gluing down layer after layer of popsicle stick hexagons until your shelf reaches your desired depth. I made mine approximately three inches deep. This equates to 17 popsicle sticks per side for a total of 102 sticks.
Step 6
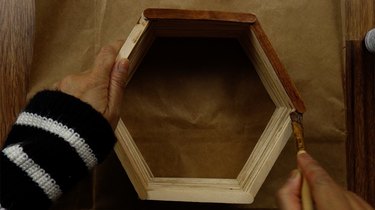
Finally, stain your shelf according to the manufacturer's directions for the specific product you're using. I used a craft gel wood stain, so I'm using a paint brush and wiping away any excess gel.
Tip
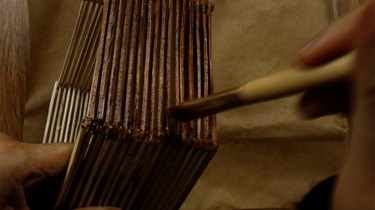
Staining the hard-to-reach areas between the popsicle stick layers (see below) can be tricky. You'll have to use a small flat brush to get in between those tight spots. I decided to go for a weathered appearance, so didn't attempt to reach every single area between the layers nor stain the entire surface evenly. If you’d like yours to have a more polished appearance, I recommend using spray stain or consider coloring with spray paint to ensure that the areas in between the sticks are thoroughly and evenly coated.
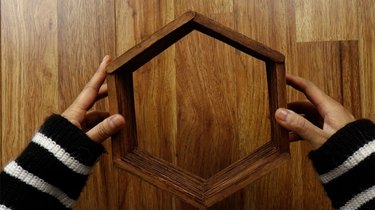
Once you've stained it to your liking, allow to dry completely. Once dry, your shelf is now ready to mount! I hung mine using drywall screws and anchors at each top corner of the shelf.
Using the Basic Template for Other Configurations
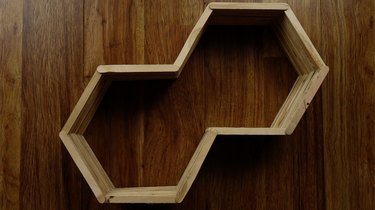
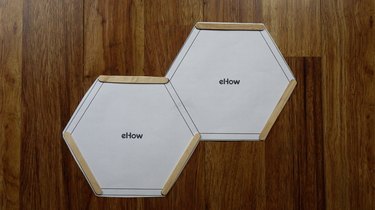
As shown in the video above, you can combine two or more template printouts to make other configurations. Below are instructions on how to make the double hexagon shelf pictured here.
Step 1
Download and print two templates and cut them out.

Step 2
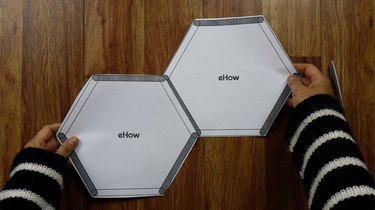
Join your templates as shown, then tape them together — with one white side overlapping one gray side of the other template. Ensure that no gray or white sides are connected to each other on the outer edges of your shape. In other words, your finished shape should only have alternating gray and white sides all the way around.

Step 3
As shown in the basic instructions, place sticks on the gray colored areas, then tape them down.
Step 4
Now, create your foundation layer by gluing down the rest of the popsicle sticks that complete the double hexagon shape (refer to Step 4 in the basic shelf instructions above).
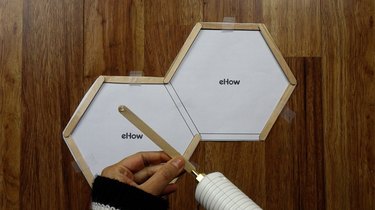
Important: Don't place a popsicle stick on the side where the two templates were joined — only along the outer edges.
Step 5
Remove the tape and template from your work. Continue layering and gluing your sticks in the same order as before until you've reached your desired depth.

Once you've reached your desired depth, it's time to stain your shelf. (Refer to step 6 in the basic instructions above.)

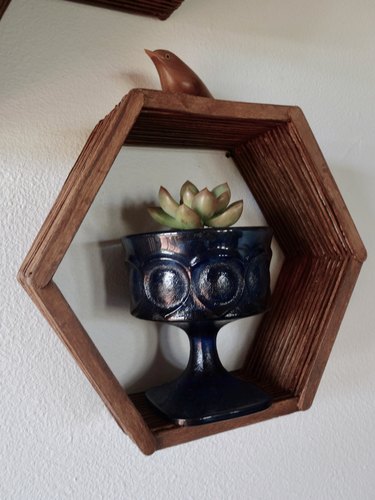
Once dried, your shelf is ready to hang. They'll add some retro flavor to your abode and are perfect for displaying small plants, flameless candles, and lightweight sculptures. Best of all, you get to take pride in the fact that you made them yourself — out of popsicle sticks no less. How's that for a conversation starter?


Tip
You can make additional configurations by joining two or more templates together. It will be easiest if you ensure that no gray or white sides are connected to each other on the outer edges of your shape. That is, your finished shape should only have alternating gray and white sides all the way around. If you do that, it’ll be simple to figure out where you’ll need to lay down your first set of sticks to create your foundation.


